Using the Continuing Education Portal
Aspen's Continuing Education portal lets parents, students, and other community members sign up for classes and activities offered by their
To access the Continuing Education portal:
- Log on to Aspen.
- Do one of the following:
-
 For desktop:
- If you are already an Aspen user, your default view appears. For example, the parent of an Aspen student sees the Family view when they log in. From the view drop-down, select Continuing education:

The Pages tab in the Continuing Education portal appears. Click Registration.
- If you are new to Aspen, the Pages tab in the Continuing Education portal appears. Click Registration.

The Course Registration page appears.
- If you are already an Aspen user, your default view appears. For example, the parent of an Aspen student sees the Family view when they log in. From the view drop-down, select Continuing education:
-
For Aspen Go (mobile version):
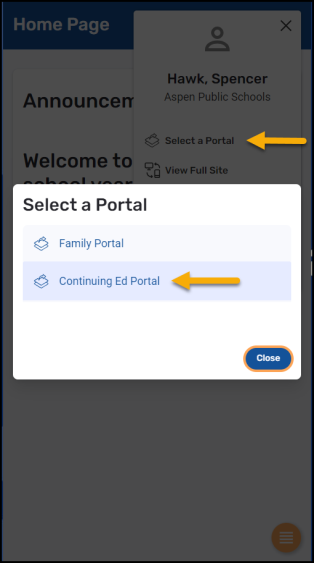
- If you are already an Aspen user, your default view appears. For example, the parent of an Aspen student sees the Family view when they log in. Tap the user icon
 in the top corner. Tap Select a Portal on the pop-up, and then tap Continuing Ed Portal:
-
The Continuing Ed Home Page appears. Use the menu button to navigate the application: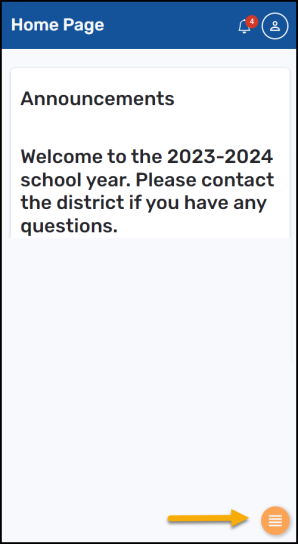
- If you are new to Aspen, the Home Page in the Continuing Ed portal appears.
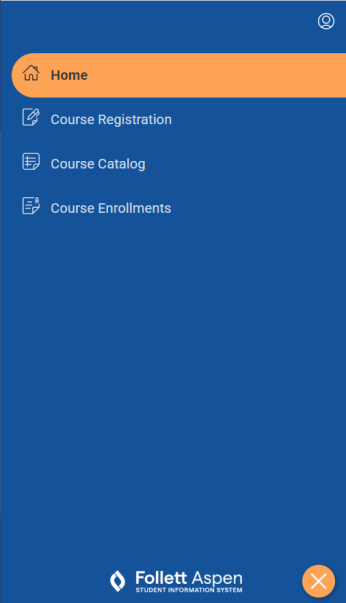
Click the Menu icon :
:
The Continuing Ed menu appears.
- If you are already an Aspen user, your default view appears. For example, the parent of an Aspen student sees the Family view when they log in. Tap the user icon
To browse courses:
- Do one of the following:
- Desktop: Select Registration > Course Catalog.
- Aspen Go: Tap Course Catalog.
- Click or tap Select Category. Select a category of courses to review, or All to review all course offerings. The list of courses appears.
- To view details about a course, click or tap its name or course number. The Details page appears.
- Do one of the following:
- Click or tap the Back button to return to the Browse Courses page.
- Click or tap Register to enroll in the course. Jump to step 3 in "To enroll in a course".
To enroll in a course:
- Do one of the following:
- Desktop: Select Registration > Course Registration.
- Aspen Go: Tap the Menu icon
 > Course Registration.
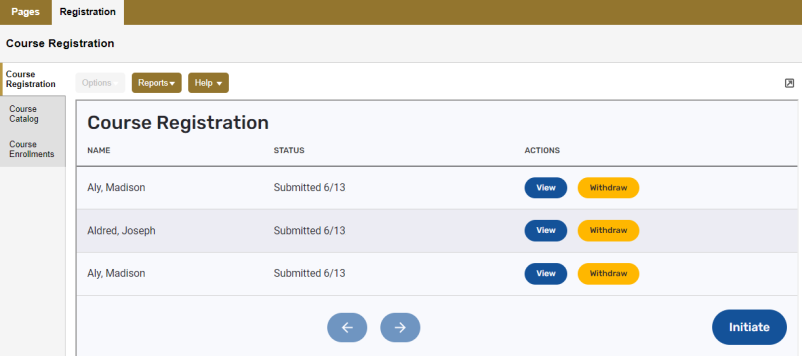
The Course Registration page appears.
- Click or tap Initiate. The Start sub-tab appears.
- Click or tap the Registration Option drop-down, and select whether you are registering for yourself or one of your children. If you choose Register one of my students for courses, the Select a student field appears. At that drop-down, select the student you are registering.
- Click or tap the Courses sub-tab.
- At Select one or more course categories, click or tap the drop-down, and select a category (or categories) for the course(s), or select All.
- At Select one or more courses, click or tap the drop-down, and select the course(s).
- Click or tap the Submit sub-tab. The message Continuing Education course request is complete appears.
- Click or tap the Submit button to complete the process.
You can click or tap Return to forms list to go back to the Course Registration page.
|
Notes:
|
To view course enrollments (and withdraw, if needed):
- Do one of the following:
- Desktop: Select Registration > Course Enrollments.
- Aspen Go: Tap the Menu icon
 > Course Enrollments.
- At the name drop-down, select the person whose enrollments you want to view. The page displays the course enrollments and whether there is a wait list for any of the selections.
- To withdraw from a course, do one of the following:
Click or tap Edit next to the course name. A Withdraw link appears. Click or tap Withdraw. A confirmation message appears.
Click or tap the course name to view its Details page, then click or tap Withdraw. A confirmation message appears.
-
Click or tap Yes, Withdraw to cancel the enrollment, or Close to exit.