Create user-defined validations for Aspen Go
Aspen Go supports user-defined validations that run on save. These validations provide feedback to users as they enter data, protecting data integrity in Aspen. Entries that don’t meet validation rules won't save, and result in an error message.
System administrators can create validations for various situations.
| Example: An administrator wants to prevent parents from repeating contact priority values when using the new online registration feature in Aspen Go. If a parent attempts to enter a contact priority that is already in the system for that student, they can’t save and will see an error message. |
To create a user-defined validation:
Step 1: Get the Object Identifier value
-
Log on to the District (Root Organization) view.
-
Select Admin > Data Dictionary > Extensions > select SYS_OLR_001 > Tables > select Contacts / Siblings > Fields > select Contact # field.
-
Copy the value in the Data Field Config > Object Identifier field.

-
Click Cancel.
Step 2: Set the 'Unique fields' value
-
Click the Extensions side-tab.
-
Select SYS_OLR_001 > Tables.
-
Click Contacts / Siblings.
-
If Unique fields does not appear, select Default Fields from the template drop-down.
-
At Unique fields, type the related student case ID, scpStcOID. Type a comma, and then paste the Object Identifier from Step 1 (do not add spaces).
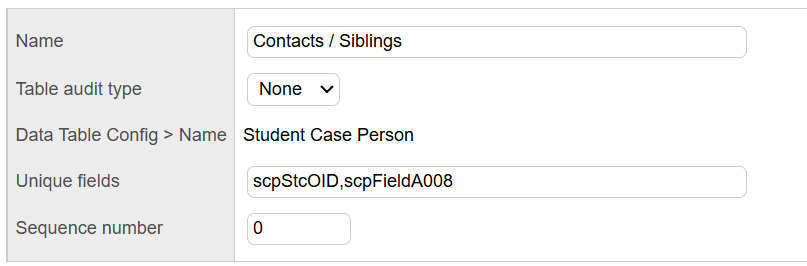
Note: The related student case ID value restricts the validation. Without it, the validation (in this case, contact priority number) would apply across all students. -
Click Save.
Now, if a parent attempts to enter the same contact priority value for two separate contacts, Aspen Go will not let them save and will display an error message.