Use checkbox and pick list options in user-defined fields
When defining a user-defined field that you want to associate with a reference table, you can use the "Detail control" field to determine how a user will select values from the reference table. Of the four options in the "Detail control" drop-down, two — Checkboxes and Picklist/Checkboxes — have special restrictions that you should consider before selecting them for your field, as well as a slightly more complex procedure for implementing them.
The following restrictions apply when using the Checkboxes and Picklist/Checkboxes options:
- The field you are defining must be a type-D user-defined field. See Create User-Defined Fields for more information on field types.
- The field must be associated with a reference table.
- The reference table must be associated with the “Reference Table – Blob Reference Checkboxes” extended Data Dictionary.
There are three steps to apply checkbox and pick list options in user-defined fields:
- Associate a reference table with the “Reference Table – Blob Reference Checkboxes” extended Data Dictionary.
- Select the reference codes within the reference table that you want to show checkboxes for.
- Associate your user-defined field with the reference table and choose your preferred method of detail control.
Step 1: Associate a Reference Table with Extended Data Dictionary
First, you must associate a reference table with the “Reference Table – Blob Reference Checkboxes” extended Data Dictionary. This dictionary enables the ShowCheckbox field to appear in the reference table's Codes page, letting you select the reference codes you want users to see as checkboxes.
- Log on to the
- Click the Admin tab, Data Dictionary side-tab.
- Click Reference.
- Either click the Name of the reference table you want to associate with the extended Data Dictionary or select the checkbox next to it and, under Reference, click Details.
- In the Extended Dictionary > Name field, click
 and select Reference Table – Blob Reference Checkboxes .
 - Click OK.
- Click Save.
Step 2: Select Reference Codes to Show Checkboxes For
Now, select which codes in the table you want to show checkboxes for. When a user enters data in a field associated with this reference table, he or she will only be able to choose from the codes you select here. To do this, you must add the ShowCheckbox field to a new or existing field set in the reference table's Codes page.
- Log on to the
- Click the Admin tab, Data Dictionary side-tab.
- Click Reference.
- Select the checkbox next to the reference table you associated with the “Reference Table - Blob Reference Checkboxes” extended Data Dictionary and, under Reference, click Codes.
- Click the Field Set menu icon
 and click Manage Field Sets. The Manage Field Sets pop-up appears:
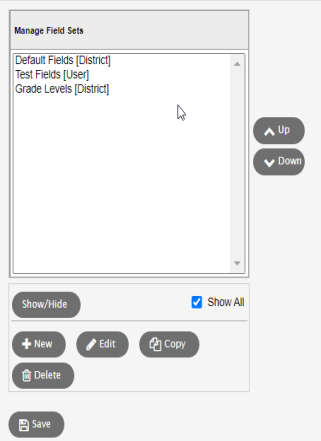
- Do one of the following:
- To create a new field set that will include the ShowCheckbox field, click New.
- To add this field to an existing field set, select the field set and click Edit.
- The Define Field Set pop-up appears:
-
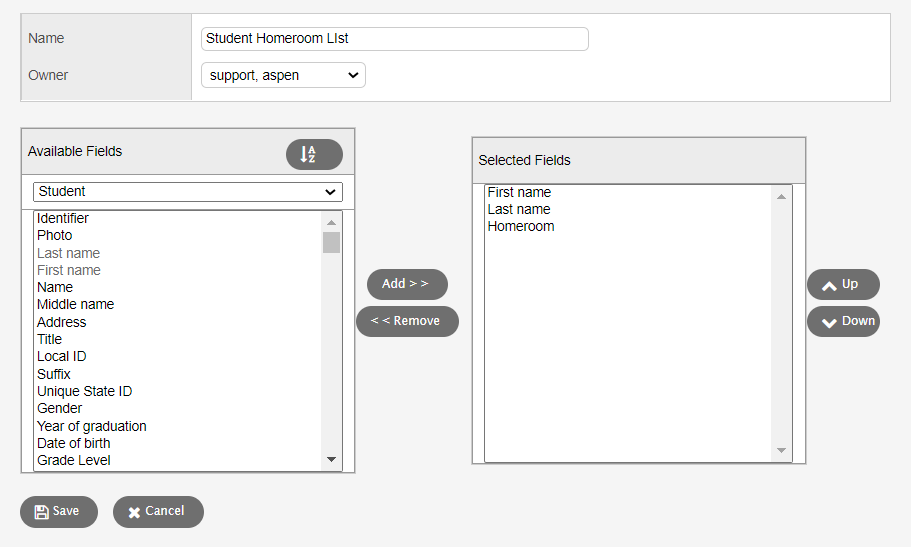
- In the Available Fields list, select Show checkbox and click Add.
- Click Save.
- Click Close.
- Click and select the field set you just created or edited. The ShowCheckbox field appears.
- On the Options menu, click Modify List.
- In the ShowCheckbox field, click
 . A checkbox appears for each reference code in the column.
 - Select the references codes that you want to show checkboxes for.
- Click
 to save your changes.
|
Warning: If you do not click |
Step 3: Modify Field Details
Finally, you need to adjust the details of the field you are defining to enable the Checkboxes or Picklist/Checkboxes detail control options.
This process involves two steps: navigating to the field's details page and modifying the relevant fields.
To navigate to the user-defined field's details page:
The way you will navigate to the field's details page depends on where the field is located. For example, assessment columns are located on the Assessment tab, whereas other user-defined fields are located in the Data Dictionary itself.
If you are modifying an assessment column:
- Log on to the
|
Note: If you log on to the |
- Click the Assessment tab, Assessment Definitions side-tab.
- Select the checkbox next to the assessment definition that is associated with the column you want to modify and, under the Assessment Definitions side-tab, click Columns.
- Click the number listed in the column’s FieldIndex field.
If you are modifying a user-defined field that is associated with a table in the Data Dictionary:
- Log on to the
- Click the Admin tab, Data Dictionary side-tab.
- Click Tables.
- Select the checkbox next to the table that is associated with the field you want to modify and, under Tables, click Fields.
- Click the field’s Name.
To modify the field's details to enable checkboxes and pick lists:
- In the Reference Table > User name field, click .
- Select a reference table associated with the “Reference Table – Blob Reference Checkboxes” extended Data Dictionary.
- Click OK.
- Click the Detail control drop-down and select either Checkboxes or Picklist/Checkboxes. The option you choose here will determine the way that users will select values from a reference table in this field. For information on the differences between various detail control options, see Enable User-Defined Fields.
- Click Save.