Use Returning Student Registration
| Note: Returning Student Registration is an add-on feature to Aspen. Contact your sales associate for more information. |
With Aspen's Returning Student registration, you can:
-
Review the information submitted by the parent or guardian, and edit it as needed.
-
Accept or deny the registration.
Process the registration from the Returning Student Registration Checklist. The Checklist side-tab has three phases that occur in this order:
-
Phase 1: Portal Re-Registration
-
Phase 2: Review
-
Phase 3: Re-Registration Approval
To process a returning student registration:
-
Do one of the following:
-
Log on to the
-
Log on to the School view. Select School > Returning Student Registrations.
A list of the returning student registrations submitted by parents/guardians appears.

Note: Click the Filter icon, and select a filter, to help you manage the list of registrations.
-
-
Select a registration to review, and then click Checklist on the side-tab. The Returning Student Registration Checklist appears.
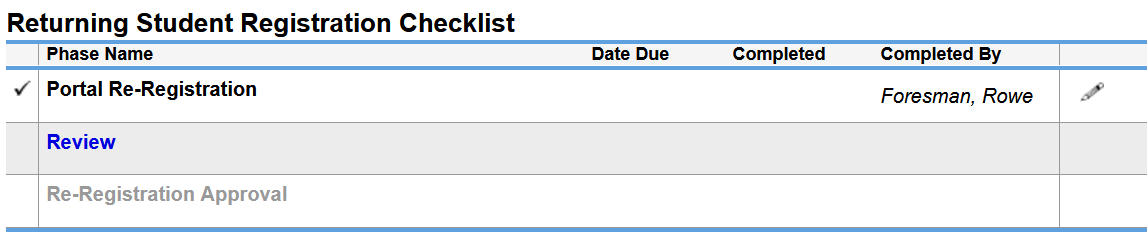
The parent or guardian already completed Phase 1, Portal Re-Registration.
-
To go to Phase 2, click Review in the checklist. Student data appears on a series of tabs as it was submitted by the parent/guardian.

-
Click each tab, and review the information entered by the parent/guardian. Enter or edit information as needed.
Notes:
-
On the Student tab, check if the parent/guardian entered data in the Address Information section. This could indicate the student has moved. If so, the school or
-
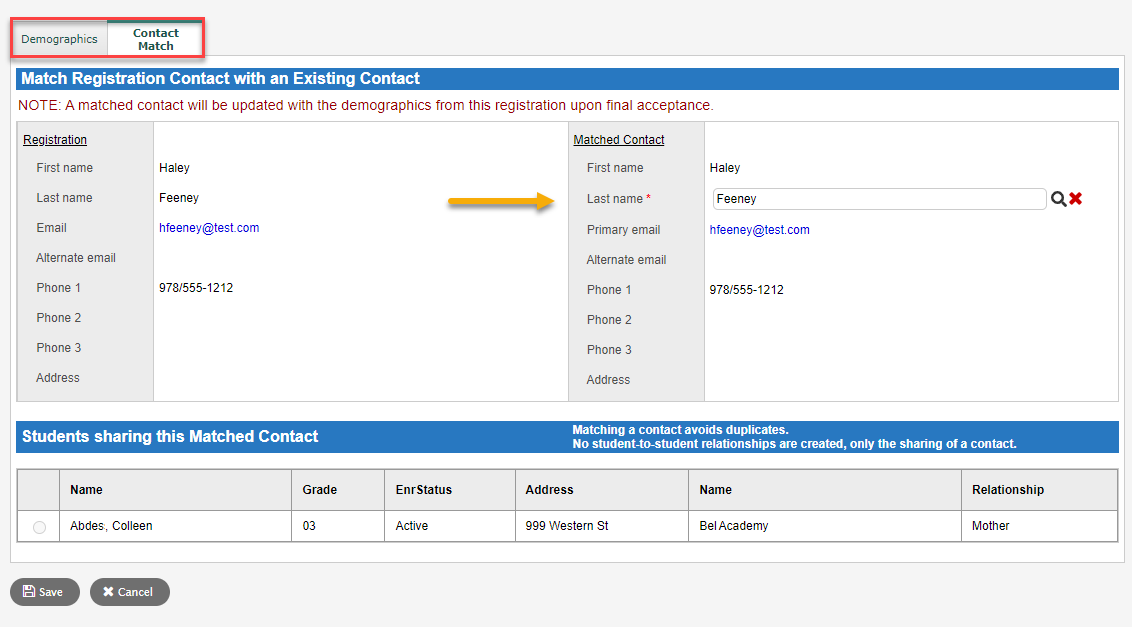
On the Family/Contacts tab, see if a contact record already exists in Aspen to prevent duplicate records. To do so, click a contact's name, and then click the Contact Match sub-tab. In the Matched Contact column, type the contact's name in the Last Name field. As you type, the drop-down narrows the list of potential matches to choose from. Select the matching contact, if found. The Students sharing this Matched Contact section displays other student(s) associated with this contact. Click Save to save your changes on the Contact Match sub-tab.
-
At the bottom of most of the tabbed pages, Reviewed all fields appears. Select Yes or No to move to a different tab. You cannot complete the Review phase until you select Yes at this field on each tab.
-
-
When you have reviewed all of the tabs, go to the Submit tab and click Submit. The Online Registration Checklist appears.
-
At Phase 3, Re-Registration Approval, do one of the following:
-
Click Accept to complete the Returning Student Registration workflow.
-
Click Deny to end this registration workflow without accepting the Returning Student Registration.
-
-
Click Save.