Create a refund for a payment
It is possible to create a full or partial refund for a payment.
To create a refund for a payment:
- Log on to the
- Do one of the following:
- In the
- In the School view: Click the School tab, Cashier's Office side-tab.
- Do one of the following:
- On the Cashier's Office side-tab, click Cashier's Office. Select the date of the payment you want to refund. Search for and select the checkbox next to the payment. Under Cashier's Office, click Details.
- On the Cashier's Office side-tab, click Payments. Search for and select the checkbox next to the payment you want to refund. Under Payments, click Details.
- On the Options menu, click Create Refund. The Refund section of the New Payment page appears:
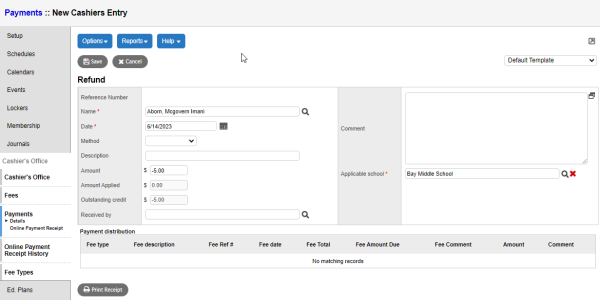
- Use the following table to fill in the fields:
Field
Description
Name
The student's name appears.
Date
The fee date appears.
Method
Click this drop-down to select the refund method, such as Cash or Check.
Description
Type a brief description, such as the check number, if desired.
Amount
The amount must be a negative number, and defaults to the amount of the most recent payment.
Notes:
To create a partial refund, do the following:- Type the amount of the refund, as a negative number, in the Amount field in the Refund section.
- Type the same number in the Payment distribution section's Amount field.
Amount applied This is a read-only field. Outstanding credit This is a read-only field. Received by Click  to select your name or the name of the person who received the money.
Comment If desired, type a comment about the refund. Applicable school This field defaults to the current school (if logged on to the School view) or default school (if logged on to the
to select a different school. Note: The refund will not appear on reports at the applicable school.
- Do one of the following:
- Click Print Receipt to print a receipt of this transaction.
- Click Save to save without printing.
- Click Cancel to cancel the transaction.